Advanced Puppeteer Web Scraping Techniques for Automated Data Extraction
Puppeteer is a powerful Node.js library that allows you to control a headless browser programmatically. This allows you to automate tasks you would normally perform in a regular browser, such as visiting web pages, clicking links, or taking screenshots—all without a graphical interface.
However, Puppeteer isn’t just limited to basic tasks. It offers advanced capabilities for tackling complex web scraping challenges, such as handling dynamic content, optimizing large-scale scraping, and bypassing anti-scraping mechanisms.
In this detailed guide, we’ll dive into Puppeteer’s advanced features to help you handle these challenges with ease.
Getting Started with Puppeteer for Web Scraping
To begin, install Puppeteer. Even if you already have it installed, running the following command will ensure you have the latest version:
npm install puppeteer
This will install Puppeteer along with a Chromium instance, which is sufficient for basic scraping tasks. However, to handle more complex scenarios, you’ll need a few additional packages:
puppeteer-extrapuppeteer-extra-plugin-stealthpuppeteer-extra-plugin-recaptchapuppeteer-cluster
… and more, which we’ll explore later in the blog.
Headless vs. Non-Headless (Headful) Mode
Headless mode is excellent for speed and performance. However, some websites use browser fingerprinting to detect and block headless browsers. If the site employs basic anti-bot measures, headless mode usually works fine.
For websites with more advanced anti-bot mechanisms, such as CAPTCHAs or stricter checks, headful mode may be a better option. Headful mode closely mimics real user behavior, making it easier to bypass tougher anti-bot defenses, though it can be slightly slower.
For example, when scraping Glassdoor, I initially used headless mode but got blocked after a few requests. Switching to headful mode allowed me to scrape all the pages I needed without issue.
Handling Dynamic Web Content
Many modern websites use JavaScript to load content dynamically, making scraping more challenging. Fortunately, Puppeteer can handle JavaScript-heavy pages by interacting with the DOM after the content is fully rendered.
When scraping dynamic pages, it’s important to ensure that content is fully loaded before extracting data. Puppeteer provides several methods to help with this, including:
waitForNetworkIdle: Waits for the network to become idle, meaning all important network requests (like API calls, images, or other assets) have finished loading. This is especially useful for Single-Page Applications (SPAs) that make multiple asynchronous requests.waitForSelector: Pauses the script until a specific element matching the provided selector appears in the DOM. This ensures the element is present before you interact with it.waitForNavigation: Waits for the browser to navigate to a new page, typically used after clicking a link or submitting a form.
Let’s see how these methods work.
Using waitForNetworkIdle
We’ll use waitForNetworkIdle to wait for all network requests to finish on the Google Finance page. Since it’s JavaScript-heavy, stock prices and financial metrics are loaded dynamically.
import puppeteer from 'puppeteer';

(async () => {
  const browser = await puppeteer.launch();
  const page = await browser.newPage();

  // Go to Google Finance website
  await page.goto('https://www.google.com/finance', { waitUntil: 'networkidle2' });

  // Wait until the network is idle
  await page.waitForNetworkIdle();

  console.log('Network is idle, page is ready!');

  await browser.close();
})();
Using waitForSelector
Next, let’s scrape stock price data from Google Finance by waiting for the stock price element to load.
import puppeteer from 'puppeteer';

(async () => {
  const browser = await puppeteer.launch({ headless: true });
  const page = await browser.newPage();

  // Go to the stock page on Google Finance
  await page.goto('https://www.google.com/finance/quote/GOOGL:NASDAQ');

  // Wait for the stock price element to load
  await page.waitForSelector('div[class="YMlKec fxKbKc"]');

  // Extract the stock price
  const stockPrice = await page.$eval('div[class="YMlKec fxKbKc"]', el => el.innerText);

  console.log(`Current Stock Price: ${stockPrice}`);

  await browser.close();
})();
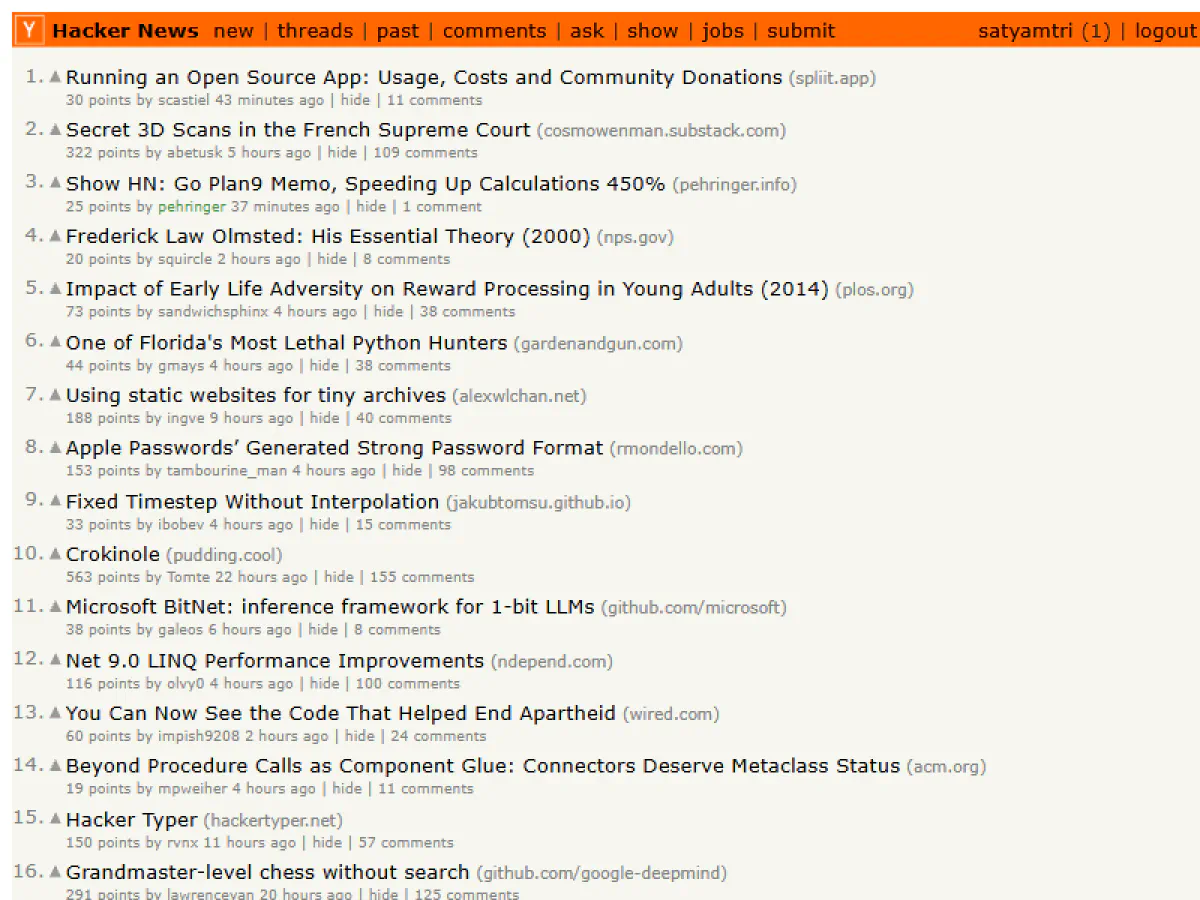
Using waitForNavigation
Here’s how to wait for navigation after submitting a login form on Hacker News.
import puppeteer from 'puppeteer';

(async () => {
  const browser = await puppeteer.launch();
  const page = await browser.newPage();

  // Navigate to Hacker News login page
  await page.goto('https://news.ycombinator.com/login');

  // Fill the login form
  await page.type('input[name="acct"]', 'your-username');
  await page.type('input[name="pw"]', 'your-password');

  // Click the login button and wait for the page to navigate
  await page.click('input[type="submit"]');
  await page.waitForNavigation();

  console.log('Login successful and navigated to the next page!');

  // Take a screenshot after login
  await page.screenshot({ path: 'screenshot.png' });

  await browser.close();
})();
Combining waitForNetworkIdle and waitForSelector
Here’s an example combining waitForNetworkIdle and waitForSelector on the Nike website. We wait for the page to fully load and then for a specific element to appear.
import puppeteer from 'puppeteer';

(async () => {
  const browser = await puppeteer.launch();
  const page = await browser.newPage();

  // Navigate to Nike New Arrivals
  await page.goto('https://www.nike.com/w/new-shoes-3n82y', { waitUntil: 'networkidle2' });

  // Wait until the network is idle (ensuring all assets load)
  await page.waitForNetworkIdle();

  // Wait for a specific selector to ensure the new arrivals section is loaded
  await page.waitForSelector('div.product-grid__items');

  // Extract the name of the first product
  const firstProductName = await page.$eval('div.product-grid__items div.product-card__title', el => el.textContent);
  console.log(`First New Arrival: ${firstProductName}`);

  await browser.close();
})();
The result might look like:
First New Arrival: Nike C1TY "Surplus"
Efficient Data Extraction and Manipulation
Puppeteer provides powerful tools for extracting and manipulating data from dynamic web pages. One such tool is the page.evaluate() method, which allows you to run custom JavaScript directly within the page context, making it perfect for scraping data from client-side JavaScript.
Using page.evaluate() for DOM Manipulation
The page.evaluate() method allows you to execute JavaScript code within the webpage’s context, giving you full access to the DOM. Here’s how you can use page.evaluate() to extract stock data from Google Finance:
import puppeteer from 'puppeteer';

(async () => {
  const browser = await puppeteer.launch({ headless: true });
  const page = await browser.newPage();

  // Navigate to Google Finance stock page
  await page.goto('https://www.google.com/finance/quote/GOOGL:NASDAQ');

  // Wait for the stock price element to load
  await page.waitForSelector('div[class="YMlKec fxKbKc"]');

  // Use page.evaluate() to extract stock price and company name directly from the page's DOM
  const stockData = await page.evaluate(() => {
    const stockPrice = document.querySelector('div[class="YMlKec fxKbKc"]').innerText;
    const companyName = document.querySelector('div[class="zzDege"]').innerText;

    return {
      companyName,
      stockPrice
    };
  });

  console.log(stockData);

  await browser.close();
})();
Output:
{ companyName: 'Alphabet Inc Class A', stockPrice: '$165.16' }
Scraping Paginated Content
Many websites, such as CoinGecko, display data across multiple pages. Puppeteer can simulate user actions, like clicking “Next” buttons, to extract data from paginated content. Below is an example of how to scrape cryptocurrency data from CoinGecko:
import puppeteer from 'puppeteer';
import fs from 'fs';

async function scrapeCoinGecko(pagesToScrape = null) {
  const browser = await puppeteer.launch({ headless: false });
  const page = await browser.newPage();

  let results = [];
  let nextPage = true;
  let currentPage = 1;

  while (nextPage) {
    console.log(`Scraping page ${currentPage}...`);

    try {
      await page.goto(`https://www.coingecko.com/?page=${currentPage}`, {
        waitUntil: 'domcontentloaded',
        timeout: 60000
      });

      // Wait for the table to be loaded before proceeding
      await page.waitForSelector('tbody tr', { timeout: 60000 });

      const data = await page.evaluate(() => {
        const rows = Array.from(document.querySelectorAll('tbody tr'));
        return rows.map(row => {
          const coinRank = row.querySelector('td:nth-child(2)')?.innerText.trim();
          const coinName = row.querySelector('td:nth-child(3) a')?.innerText.trim();
          const coinPrice = row.querySelector('td:nth-child(5) span')?.innerText.trim();
          const oneHourChange = row.querySelector('td:nth-child(6) span')?.innerText.trim();
          const twentyFourHourChange = row.querySelector('td:nth-child(7) span')?.innerText.trim();
          const sevenDayChange = row.querySelector('td:nth-child(8) span')?.innerText.trim();
          const marketCap = row.querySelector('td:nth-child(12) span')?.innerText.trim();

          return {
            rank: coinRank,
            name: coinName,
            price: coinPrice,
            change_1h: oneHourChange,
            change_24h: twentyFourHourChange,
            change_7d: sevenDayChange,
            market_cap: marketCap
          };
        });
      });

      results = results.concat(data);

      // Check if a maximum number of pages is specified and stop when reached
      if (pagesToScrape && currentPage >= pagesToScrape) {
        nextPage = false;
        console.log(`Scraped ${currentPage} pages as requested.`);
      } else {
        // Check if there's a next page
        nextPage = await page.evaluate(() => {
          const nextBtn = document.querySelector('a[rel="next"]');
          return !!nextBtn;
        });
      }

      currentPage++;
    } catch (error) {
      console.error(`Error scraping page ${currentPage}:`, error);
      nextPage = false; // Stop the loop in case of error
    }
  }

  // Save the data to a JSON file
  fs.writeFileSync('coingecko_data.json', JSON.stringify(results, null, 2));

  console.log(`Scraping completed. Data saved to coingecko_data.json`);

  await browser.close();
}

// Pass the number of pages you want to scrape, or leave it empty to scrape all pages.
scrapeCoinGecko(5); // Example: scrape the first 5 pages, or pass null to scrape till the end.
The result might look like this:
[
  {
    "rank": "1",
    "name": "Bitcoin\nBTC",
    "price": "$67,326.53",
    "change_1h": "0.2%",
    "change_24h": "0.2%",
    "change_7d": "10.7%",
    "market_cap": "$1,413,857,046,000"
  },
  {
    "rank": "2",
    "name": "Ethereum\nETH",
    "price": "$2,630.40",
    "change_1h": "0.1%",
    "change_24h": "0.5%",
    "change_7d": "9.9%",
    "market_cap": "$316,695,053,765"
  },
  {
    "rank": "3",
    "name": "Tether\nUSDT",
    "price": "$0.9995",
    "change_1h": "0.0%",
    "change_24h": "0.1%",
    "change_7d": "0.1%",
    "market_cap": "$119,889,742,089"
  }
]
This code runs in headful mode. In headless mode, you may encounter CAPTCHAs like this:

We’ll cover CAPTCHA handling techniques later!
Bypassing Anti-Scraping Mechanisms
Most modern websites use some form of bot protection, making it critical to bypass these mechanisms when web scraping. Websites can detect headless browsers by accessing various properties, using techniques like browser fingerprinting to determine whether automation is being used.
By default, Puppeteer exposes certain automation properties, which can flag it as a bot. Fortunately, the puppeteer-extra-plugin-stealth package helps mitigate this by using a range of evasion techniques to reduce the risk of being blocked.
Puppeteer Stealth is an extension built on top of Puppeteer Extra, designed to hide properties such as headless: true and navigator.webdriver, which can otherwise expose your browser as automated. This plugin mimics real user behavior and masks automation traces, making it harder for websites to detect your scraper.
💡 Puppeteer Extra offers multiple plugins for various tasks, such as solving CAPTCHAs, blocking ads, blocking resources, anonymizing the user agent, and much more.
Using the Stealth Plugin
First, install puppeteer-extra and the Stealth plugin:
npm install puppeteer-extra puppeteer-extra-plugin-stealth
Now, launch Puppeteer with the Stealth plugin activated.
import puppeteer from 'puppeteer-extra';
import StealthPlugin from 'puppeteer-extra-plugin-stealth';
import fs from 'fs';

// Enable Stealth Plugin to avoid detection
puppeteer.use(StealthPlugin());

async function scrapeCoinGecko(pagesToScrape = null) {
  const browser = await puppeteer.launch({ headless: true });
  const page = await browser.newPage();

  let results = [];
  let nextPage = true;
  let currentPage = 1;

  while (nextPage) {
    console.log(`Scraping page ${currentPage}...`);

    try {
      await page.goto(`https://www.coingecko.com/?page=${currentPage}`, {
        waitUntil: 'domcontentloaded',
        timeout: 60000,
      });

      // Wait for 3 seconds to ensure the page is fully loaded
      await new Promise((resolve) => setTimeout(resolve, 3000));

      // Take a screenshot of the current page
      await page.screenshot({ path: `coingecko_page_${currentPage}.png` });

      // Wait for the table containing the data to load before proceeding
      await page.waitForSelector('tbody tr', { timeout: 60000 });

      const data = await page.evaluate(() => {
        const rows = Array.from(document.querySelectorAll('tbody tr'));
        return rows.map((row) => {
          const coinRank = row.querySelector('td:nth-child(2)')?.innerText.trim();
          const coinName = row.querySelector('td:nth-child(3) a')?.innerText.trim();
          const coinPrice = row.querySelector('td:nth-child(5) span')?.innerText.trim();
          const oneHourChange = row.querySelector('td:nth-child(6) span')?.innerText.trim();
          const twentyFourHourChange = row.querySelector('td:nth-child(7) span')?.innerText.trim();
          const sevenDayChange = row.querySelector('td:nth-child(8) span')?.innerText.trim();
          const marketCap = row.querySelector('td:nth-child(12) span')?.innerText.trim();

          return {
            rank: coinRank,
            name: coinName,
            price: coinPrice,
            change_1h: oneHourChange,
            change_24h: twentyFourHourChange,
            change_7d: sevenDayChange,
            market_cap: marketCap,
          };
        });
      });

      results = results.concat(data);

      // Check if a maximum number of pages is specified and stop when reached
      if (pagesToScrape && currentPage >= pagesToScrape) {
        nextPage = false;
        console.log(`Scraped ${currentPage} pages as requested.`);
      } else {
        // Check if there's a next page by looking for the "next" button
        nextPage = await page.evaluate(() => {
          const nextBtn = document.querySelector('a[rel="next"]');
          return !!nextBtn;
        });
      }

      currentPage++;
    } catch (error) {
      console.error(`Error scraping page ${currentPage}:`, error);
      nextPage = false;
    }
  }

  // Save the scraped data to a JSON file
  fs.writeFileSync('coingecko_data.json', JSON.stringify(results, null, 2));

  console.log(`Scraping completed. Data saved to coingecko_data.json`);

  await browser.close();
}

// Pass the number of pages you want to scrape, or leave empty to scrape all pages.
scrapeCoinGecko(5); // Example: scrape the first 5 pages, or pass null to scrape all pages.
Using Proxies to Avoid IP Blocking
One of the most common anti-scraping measures is IP blocking or rate limiting. This occurs when a website detects too many requests coming from the same IP address within a short period. Using proxies ensures that each request appears to come from a different IP address, helping avoid IP bans.
Free proxies (such as those from Free Proxy List) are often unreliable for large-scale web scraping due to their short lifespan and poor performance. For real web scraping projects, it’s better to use a premium proxy service like Scrape.do, which offers pools of rotating proxies and anti-bot measures.
Here’s an example of setting up rotating proxies with Puppeteer and Scrape.do:
import puppeteer from 'puppeteer-extra';
import StealthPlugin from 'puppeteer-extra-plugin-stealth';

puppeteer.use(StealthPlugin());

async function scrapeLowesProduct() {
  const browser = await puppeteer.launch({
    headless: true,
    args: [
      '--no-sandbox',
      '--disable-setuid-sandbox',
      // Adding Scrape.do proxy server
      '--proxy-server=http://proxy.scrape.do:8080',
      '--ignore-certificate-errors',
    ],
  });

  const page = await browser.newPage();

  // Set up proxy authentication with proxy credentials
  await page.authenticate({
    username: '<USERNAME>',
    password: '<PASSWORD>',
  });

  try {
    console.log('Scraping product title...');

    await page.goto('https://www.lowes.com/pd/brentwood-Auto-Steam-Iron/1001439740', {
      waitUntil: 'domcontentloaded',
      timeout: 60000,
    });

    await new Promise((resolve) => setTimeout(resolve, 3000));

    await page.screenshot({ path: 'lowes_product.png' });

    // Extract the product title
    const title = await page.evaluate(() => document.querySelector('h1')?.innerText.trim());

    console.log(`Product Title: ${title}`);
  } catch (error) {
    console.error('Error scraping product title:', error);
  }

  await browser.close();
}

scrapeLowesProduct();
In this code, the proxy server is specified in the Puppeteer launch options (--proxy-server=http://proxy.scrape.do:8080), allowing all browser requests to be routed through Scrape.do for anonymity.
The output is:
Product Title: brentwood Black Auto-steam Iron (1100-Watt)
The page might look like:

Lowe’s uses the Akamai bot protection system, which we successfully bypassed by using Scrape.do.
Managing Sessions and Cookies
When scraping websites that require login, managing authentication and sessions becomes important. Logging in repeatedly for each session can slow down the process and may even trigger anti-bot mechanisms. Puppeteer offers tools to save session cookies after authentication, allowing you to reuse them for future scraping sessions without logging in again.
Save Session Cookies
By saving session cookies, you can reuse them to keep the logged-in state across multiple scraping sessions. Here’s how you can log in to Hacker News, save the session cookies, and use them later:
import puppeteer from 'puppeteer-extra';
import fs from 'fs';

(async () => {
  const browser = await puppeteer.launch({ headless: false });
  const page = await browser.newPage();

  // Hacker News login page
  await page.goto('https://news.ycombinator.com/login', { waitUntil: 'networkidle0' });

  // Enter login credentials
  await page.type('input[name="acct"]', '<YOUR-USERNAME>');
  await page.type('input[name="pw"]', '<YOUR-PASSWORD>');

  // Submit the login form and wait for the page to load
  await Promise.all([
    page.click('input[value="login"]'),
    page.waitForNavigation({ waitUntil: 'networkidle0' })
  ]);

  // Save session cookies to a file for future use
  const cookies = await page.cookies();
  fs.writeFileSync('cookies_hackernews.json', JSON.stringify(cookies, null, 2));
  console.log('Session cookies saved to cookies_hackernews.json');

  await browser.close();
})();
in this code, Puppeteer navigates to the Hacker News login page, logs in, and saves the session cookies to a file (cookies_hackernews.json).
Restore Cookies for Future Sessions
Once you’ve saved the session cookies, you can load them in future scraping sessions. This bypasses the login processes.
import puppeteer from 'puppeteer-extra';
import fs from 'fs';

(async () => {
  const browser = await puppeteer.launch({ headless: false });
  const page = await browser.newPage();

  // Load cookies from the saved file
  const cookies = JSON.parse(fs.readFileSync('cookies_hackernews.json', 'utf-8'));
  await page.setCookie(...cookies);

  // Navigate to the Hacker News homepage
  await page.goto('https://news.ycombinator.com', { waitUntil: 'networkidle0' });

  // Check if the user is logged in by looking for the profile link
  const userProfileLink = await page.$('a[href="user?id=your-username"]');
  if (userProfileLink) {
    console.log('Session restored. You are logged in.');
  } else {
    console.log('Failed to restore session.');
  }

  await browser.close();
})();
In this code, the cookies are loaded from the cookies_hackernews.json file and applied to the page using page.setCookie(). Then, it navigates to the content without needing to log in again. It checks for the presence of the user profile link to confirm the session was restored successfully.
The result shows that we’ve successfully logged in by loading the cookies.
Handling Expired Sessions
Session cookies can expire after a certain time or due to server-side restrictions. It’s important to verify if the session is still valid when restoring cookies. If the session has expired, you’ll need to reauthenticate and save new cookies.
You can check the session status by monitoring the response from the page:
const response = await page.goto('https://news.ycombinator.com');

if (response.status() === 401) {  // 401 Unauthorized status indicates the session has expired
  console.log('Session expired, logging in again...');
  // Re-login and save new session cookies here
}
In this case, if the session has expired, the script will log in again and save new session cookies.
Handling CAPTCHA and Bot Detection
CAPTCHAs are one of the biggest challenges when it comes to web scraping, and they are becoming increasingly sophisticated. But don’t worry, there are effective ways to handle them.
Can CAPTCHA Be Bypassed?
Yes, CAPTCHA challenges can be bypassed, but it’s not always easy. The best approach is to prevent CAPTCHAs from appearing in the first place by mimicking real user behavior. If you do encounter a CAPTCHA, retrying the request with appropriate measures can help.
Solving CAPTCHAs Using Third-Party Services
CAPTCHAs in Puppeteer can be solved using services like 2Captcha, which uses human workers to solve CAPTCHA challenges for you. When you send a CAPTCHA to 2Captcha, a human solves it and sends the answer back to your scraper, which can then use it to bypass the CAPTCHA.
Let’s look at how to solve an hCAPTCHA using 2Captcha on the hCaptcha demo page.

Before proceeding, make sure to install the 2Captcha library:
npm install 2captcha
To solve an hCAPTCHA, you’ll need to extract the data-sitekey property from the CAPTCHA’s HTML structure and pass it to 2Captcha’s API.
Sign up at 2Captcha to get your API key. Replace YOUR_2CAPTCHA_API_KEY in the code below with your actual API key.
import Captcha from '2captcha';

const solver = new Captcha.Solver("YOUR_2CAPTCHA_API_KEY");

solver
  .hcaptcha("PUT_DATA_SITEKEY", "https://2captcha.com/demo/hcaptcha")
  .then(() => {
    console.log("hCAPTCHA passed successfully");
  })
  .catch((err) => {
    console.error(err.message);
  });
If successful, the output will show: hCAPTCHA passed successfully. You can use this approach for solving audio CAPTCHAs, reCAPTCHA, and other CAPTCHA types supported by 2Captcha.
Using Free CAPTCHA Solvers
Puppeteer-extra-plugin-recaptcha is a free, open-source plugin that can automate solving reCAPTCHA and hCAPTCHA challenges. You can also integrate it with 2Captcha if you need more advanced CAPTCHA-solving capabilities.
First, install the plugin:
npm install puppeteer-extra-plugin-recaptcha
Then, configure the solver with your 2Captcha API key:
import puppeteer from 'puppeteer-extra';
import RecaptchaPlugin from 'puppeteer-extra-plugin-recaptcha';

// Configure the RecaptchaPlugin with 2Captcha
puppeteer.use(
  RecaptchaPlugin({
    provider: {
      id: '2captcha',
      token: 'YOUR_2CAPTCHA_API_KEY',
    },
    visualFeedback: true, // Shows visual feedback when solving reCAPTCHAs
  })
);
Once configured, use page.solveRecaptchas() to automatically solve CAPTCHAs on the target webpage:
puppeteer.launch({ headless: true }).then(async (browser) => {
  const page = await browser.newPage();

  // Navigate to a page with a reCAPTCHA challenge
  await page.goto('https://2captcha.com/demo/recaptcha-v2');

  // Solve the reCAPTCHA automatically
  await page.solveRecaptchas();

  // Submit the form and wait for navigation
  await Promise.all([page.waitForNavigation(), page.click('#recaptcha-demo-submit')]);

  // Capture a screenshot of the response page
  await page.screenshot({ path: 'response.png', fullPage: true });

  await browser.close();
});
Preventing CAPTCHA Triggers
Rather than solely relying on CAPTCHA-solving services, it’s a good idea to take steps to prevent CAPTCHAs from being triggered in the first place. Here are some techniques to help avoid bot detection:
1. Simulate Real User Interactions
Acting too quickly can often result in CAPTCHAs being triggered. Mimicking human behavior, such as moving the mouse and scrolling, may help avoid detection.
// Simulating mouse movements
await page.mouse.move(100, 200);
await page.mouse.move(300, 400);

// Simulating page scrolling
await page.evaluate(() => window.scrollBy(0, 500));
2. Rotate User Agents
Changing the user agent string for each request helps avoid detection by making every session appear unique.
const userAgents = [
  'Mozilla/5.0 (Windows NT 10.0; Win64; x64) AppleWebKit/537.36 (KHTML, like Gecko) Chrome/58.0.3029.110 Safari/537.3',
  'Mozilla/5.0 (Macintosh; Intel Mac OS X 10_12_6) AppleWebKit/602.3.12 (KHTML, like Gecko) Version/10.1.2 Safari/602.3.12',
  'Mozilla/5.0 (iPhone; CPU iPhone OS 10_3 like Mac OS X) AppleWebKit/602.1.50 (KHTML, like Gecko) Version/10.0 Mobile/14E5239e Safari/602.1',
];

// Set a random user agent for each session
const userAgent = userAgents[Math.floor(Math.random() * userAgents.length)];
await page.setUserAgent(userAgent);
3. Add Random Delays
Adding random delays between actions makes your bot’s behavior less predictable and more human-like.
// Adding random delays between actions
await page.waitForTimeout(Math.random() * 1000 + 500); // 500ms to 1500ms delay
4. Use Non-Headless Mode
Some websites can detect when Puppeteer is running in headless mode. Running it in non-headless mode can sometimes bypass detection.
// Launch Puppeteer in non-headless mode
const browser = await puppeteer.launch({ headless: false });
5. Rotate Proxies
Using the same IP address for multiple requests can trigger anti-bot systems. Rotating proxies helps you avoid this by making requests appear to come from different locations.
const proxies = [
  'http://username:[email protected]:8080',
  'http://username:[email protected]:8080',
  'http://username:[email protected]:8080',
];

// Launch browser with a proxy
const browser = await puppeteer.launch({
  headless: true,
  args: [`--proxy-server=${proxies[Math.floor(Math.random() * proxies.length)]}`],
});
While 2Captcha is great for solving individual CAPTCHAs, it can become expensive for large-scale projects. For a more robust solution, consider using Scrape.do.
Scrape.do offers rotating proxies along with an all-in-one web scraping API that automatically handles CAPTCHAs and anti-bot measures. This allows you to focus on your scraping tasks without the concern of overcoming anti-bot systems.
Here’s how to integrate Scrape.do API:
import axios from 'axios';
import { stringify as querystringStringify } from 'querystring';
// Define API token and target URL
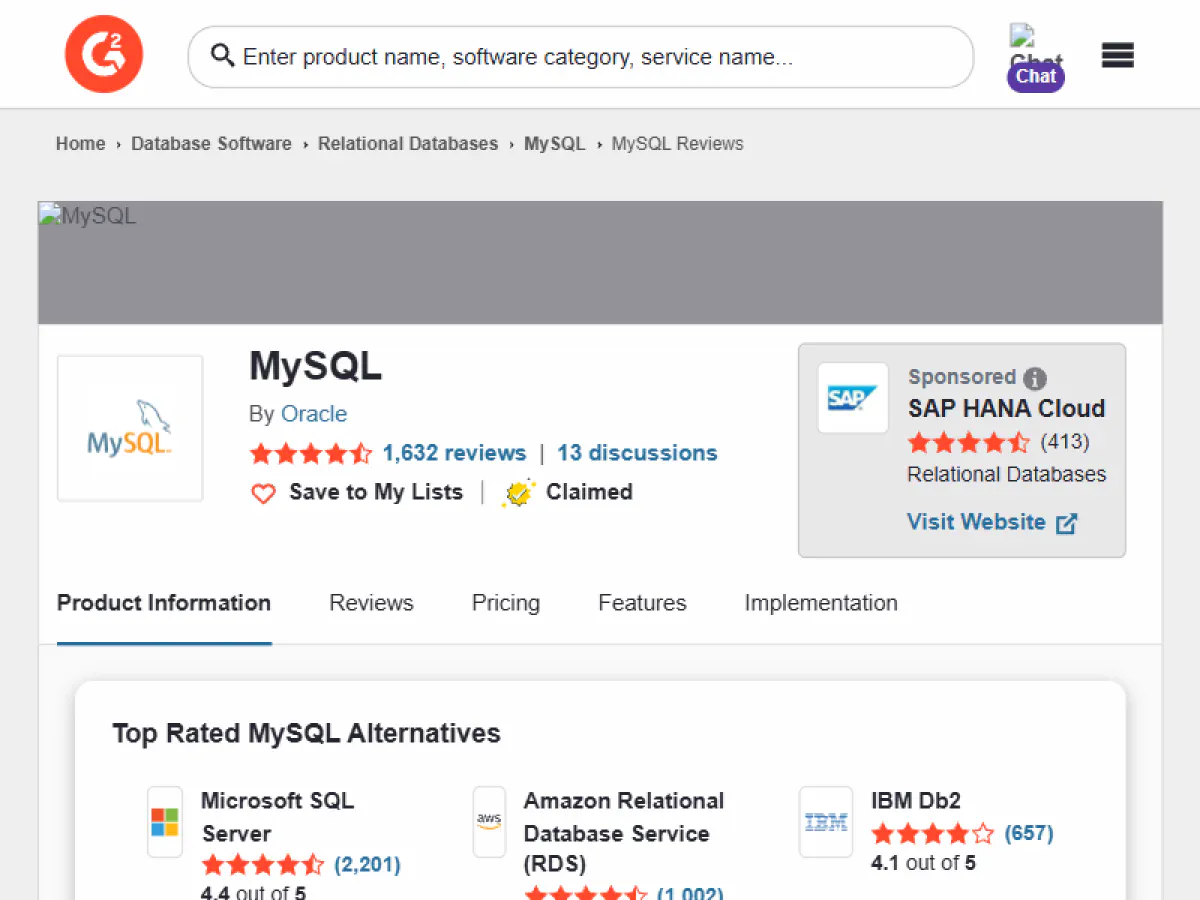
const token = 'YOUR_API_TOKEN';
const targetUrl = 'https://www.g2.com/products/mysql/reviews';
// Base URL for the API
const baseUrl = 'http://api.scrape.do';
// Construct the query parameters
const queryParams = querystringStringify({
token: token,
url: targetUrl, // The target URL to scrape
render: 'true', // Render the page
waitUntil: 'domcontentloaded', // Wait until the DOM is fully loaded
blockResources: 'true', // Block unnecessary resources from loading
geoCode: 'us', // Set the geolocation for the request
super: 'true' // Use Residential & Mobile Proxy Networks
});
// Full URL with query parameters
const apiUrl = `${baseUrl}?${queryParams}`;
// Send GET request to the API
try {
const response = await axios.get(apiUrl);
// Print the response status code and content
console.log('Status Code:', response.status);
console.log(response.data);
} catch (error) {
console.error('Error:', error.response ? error.response.status : error.message);
}
When you execute this code, it bypasses CAPTCHAs and retrieves the HTML content from G2’s review page.
The result would be:
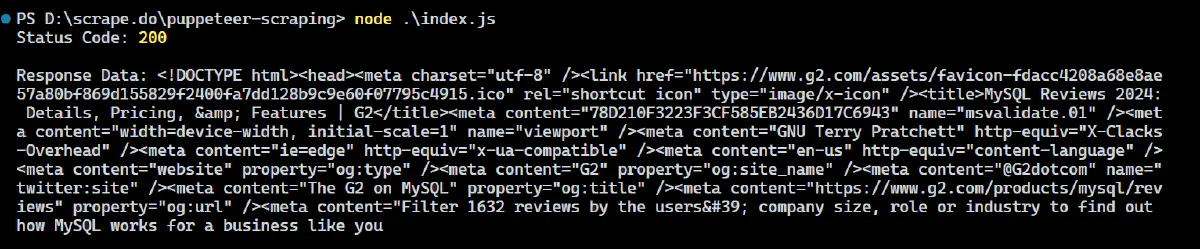
Amazing! You’ve successfully bypassed a Cloudflare-protected website and scraped its full-page HTML using Scrape.do 🚀
Scraping Single-Page Applications (SPAs)
Single-page applications (SPAs) often rely on AJAX calls to load content dynamically without refreshing the page. This can make scraping more complex, but Puppeteer offers powerful tools to intercept network requests and extract data directly from API responses. Instead of waiting for the DOM to update, you can capture network traffic and get JSON data straight from the API responses—making the process faster and more reliable.
Let’s walk through how you can scrape product information from Nike’s website by intercepting network requests.
Identifying the Right Network Request
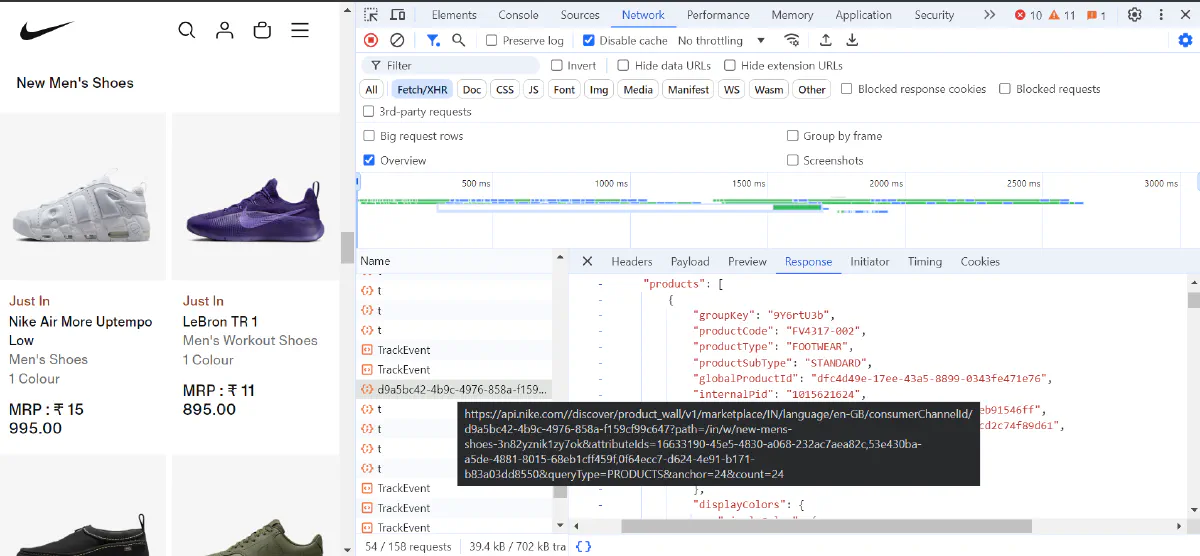
Before writing the code, you need to identify which network request fetches the product data:
- Open Browser Dev Tools: Go to the “Network” tab in your browser’s developer tools and navigate through the Nike website. Look for requests that return product data in JSON format.
- Filter by XHR: Filter by XHR (XMLHttpRequest) in the network tab to narrow down AJAX requests.
- Inspect the Payloads: Check the response payloads of these requests to make sure they contain the product data you want.
Here’s how you can intercept the network request, capture product data, and save it to a JSON file:
import puppeteer from 'puppeteer';
import fs from 'fs';

(async () => {
  const browser = await puppeteer.launch({ headless: true });
  const page = await browser.newPage();
  let extractedData = [];

  // Intercept and listen to all network responses
  page.on('response', async (response) => {
    const requestUrl = response.url();

    // Check if the response URL matches the Nike API endpoint
    if (requestUrl.includes('https://api.nike.com')) {
      try {
        // Check if the response contains JSON data
        const contentType = response.headers()['content-type'];

        // Only process responses with JSON content and GET requests
        if (contentType && contentType.includes('application/json') && response.request().method() === 'GET') {
          // Parse the JSON response body
          const jsonResponse = await response.json();

          // Extract relevant product data from the response (if exists)
          const relevantData = jsonResponse?.productGroupings?.flatMap(group =>
            group.products.map(product => ({
              title: product.copy?.title,                  // Product title
              subTitle: product.copy?.subTitle,            // Product subtitle
              productCode: product.productCode,            // Product code
              price: product.prices?.currentPrice,         // Current price
              currency: product.prices?.currency,          // Currency of the price
              color: product.displayColors?.colorDescription,  // Color description
              imageUrl: product.colorwayImages?.portraitURL,    // Product image URL
              productUrl: product.pdpUrl?.url              // Product detail page URL
            }))
          ) || [];

          // Append the extracted data to the results array
          extractedData.push(...relevantData);
        }
      } catch (error) {
        // Handle any errors that occur while parsing the JSON response
        console.error('Error parsing JSON response:', error.message);
      }
    }
  });

  // Navigate to the Nike page
  await page.goto('https://www.nike.com/in/w/new-mens-shoes-3n82yznik1zy7ok', {
    waitUntil: 'networkidle2',  // Wait until network traffic has significantly slowed
  });

  let previousHeight;
  try {
    // Implement scrolling to load additional content on the page
    while (true) {
      previousHeight = await page.evaluate(() => document.body.scrollHeight);
      await page.evaluate(() => window.scrollTo(0, document.body.scrollHeight));
      await new Promise(resolve => setTimeout(resolve, 5000));  // Wait for new content to load
      const newHeight = await page.evaluate(() => document.body.scrollHeight);
      if (newHeight === previousHeight) {
        // Stop scrolling if no more new content is loaded
        break;
      }
    }
  } catch (error) {
    console.error('Error during scrolling:', error);
  }

  // Wait for any remaining data to load
  await new Promise(resolve => setTimeout(resolve, 5000));

  // Save the extracted data to a JSON file
  fs.writeFileSync('extracted_data.json', JSON.stringify(extractedData, null, 2));
  console.log('Data saved to extracted_data.json');

  // Close the browser
  await browser.close();
})();
Puppeteer allows you to listen for network responses using the page.on('response') event. This event captures all network traffic, allowing you to inspect responses and filter out specific API requests that contain the data you need, such as JSON payloads.
Here’s what the scraped data might look like:
[
  {
    "title": "Nike Reax 8 TR",
    "subTitle": "Men's Workout Shoes",
    "productCode": "621716-020",
    "price": 7495,
    "currency": "INR",
    "color": "Black/Black/Metallic Gold",
    "imageUrl": "https://static.nike.com/a/images/t_default/i1-2917c194-bd10-44ba-a98d-3213f930f051/NIKE+REAX+8+TR+MESH.png",
    "productUrl": "https://www.nike.com/in/t/reax-8-tr-workout-shoes-wPmm1j/621716-020"
  },
  {
    "title": "Air Jordan 1 Zoom CMFT 2",
    "subTitle": "Shoes",
    "productCode": "DV1307-406",
    "price": 13295,
    "currency": "INR",
    "color": "Midnight Navy/Neutral Grey/Summit White/Varsity Red",
    "imageUrl": "https://static.nike.com/a/images/t_default/u_126ab356-44d8-4a06-89b4-fcdcc8df0245,c_scale,fl_relative,w_1.0,h_1.0,fl_layer_apply/896de240-a54b-40d3-8022-35339a424039/AIR+JORDAN+1+ZM+AIR+CMFT+2.png",
    "productUrl": "https://www.nike.com/in/t/air-jordan-1-zoom-cmft-2-shoes-nX8Qqx/DV1307-406"
  }
]
Advanced Error Handling and Debugging
When scraping dynamic websites, you’re likely to encounter issues like timeouts, failed navigation, and delayed content loading. To make scraping more reliable, it’s important to implement robust error handling, custom retry logic, and use Puppeteer’s debugging tools.
Common Challenges in Web Scraping
Scraping modern websites comes with a variety of challenges:
- Timeouts: Dynamic content can take longer to load, causing timeouts.
- Navigation Failures: Pages may not load properly due to network issues or errors.
- Dynamic Content: Asynchronous loading can cause elements to appear late, affecting your scraping logic.
- Network Errors: Unstable network conditions may interrupt API calls or page loads.
Handling Timeouts and Navigation Errors
Timeouts and navigation errors are common when dealing with slow-loading pages or unstable networks. Puppeteer’s try/catch block can help you handle these issues gracefully and retry actions if needed.
Let’s see how to handle timeouts and errors while navigating to the Nike page.
import puppeteer from 'puppeteer-extra';

(async () => {
  const browser = await puppeteer.launch({ headless: true });
  const page = await browser.newPage();

  try {
    // Navigate to the Nike page with error handling for potential timeouts
    await page.goto('https://www.nike.com/w/new-arrivals', { waitUntil: 'networkidle0', timeout: 10000 });
    console.log('Page loaded successfully.');
  } catch (error) {
    if (error.name === 'TimeoutError') {
      console.error('Page load timed out after 10 seconds:', error.message);
    } else {
      console.error('Navigation error occurred:', error.message);
    }
  } finally {
    await browser.close();
  }
})();
In this code, we load the page and wait for the network to be idle. If the page takes longer than 10 seconds, a TimeoutError is triggered. The script catches this error and prevent it from crashing.
Waiting for Dynamic Content to Load
As discussed earlier, websites like Nike load products dynamically, often through AJAX calls. Puppeteer’s page.waitForSelector() method helps you wait for specific elements to load before scraping the content.
In the code below, we wait for product cards to appear on the Nike page before extracting product information.
import puppeteer from 'puppeteer';

(async () => {
  const browser = await puppeteer.launch({ headless: true });
  const page = await browser.newPage();

  try {
    // Navigate to the page
    await page.goto('https://www.nike.com/w/new-arrivals', { waitUntil: 'networkidle0' });

    // Wait for product cards to appear
    await page.waitForSelector('.product-card__body', { timeout: 5000 });

    // Extract product information from each card
    const products = await page.$$eval('.product-card__body', items => {
      return items.map(item => ({
        name: item.querySelector('.product-card__title')?.innerText || 'No Name',
        price: item.querySelector('.product-price')?.innerText || 'No Price',
        link: item.querySelector('a.product-card__link-overlay')?.href || 'No Link'
      }));
    });

    console.log('Extracted Products:', products);

  } catch (error) {
    console.error('Error occurred while fetching product data:', error);
  } finally {
    await browser.close();
  }
})();
In this code, page.waitForSelector() ensures that the product listings are fully loaded before we attempt to scrape the data. If the elements don’t load within 5 seconds, an error is thrown and handled in the catch block.
Implementing Retry Logic
Sometimes, even after handling timeouts, actions may still fail due to temporary issues, such as slow network responses. To make your scraping script more robust, you can implement retry logic that retries an action multiple times before giving up.
Below is an example of a custom retry() function that attempts the page navigation up to 3 times with a delay between each try.
import puppeteer from 'puppeteer';

// Custom retry function to retry an action up to a specified number of times
const retry = async (fn, retries = 3, delay = 2000) => {
  for (let i = 0; i < retries; i++) {
    try {
      return await fn();  // Try to execute the function
    } catch (error) {
      console.error(`Attempt ${i + 1} failed: ${error.message}`);
      if (i < retries - 1) {
        console.log(`Retrying in ${delay}ms...`);
        await new Promise(res => setTimeout(res, delay));  // Wait before retrying
      } else {
        console.error('All retry attempts failed.');
        throw error;
      }
    }
  }
};

(async () => {
  const browser = await puppeteer.launch({ headless: true });
  const page = await browser.newPage();

  try {
    // Retry navigation with up to 3 attempts
    await retry(() => page.goto('https://www.nike.com/w/new-arrivals', { waitUntil: 'networkidle0', timeout: 10000 }), 3, 2000);

    // Wait for product cards to load
    await page.waitForSelector('.product-card__body', { timeout: 5000 });

    // Scrape product data
    const products = await page.$$eval('.product-card__body', items => {
      return items.map(item => ({
        name: item.querySelector('.product-card__title')?.innerText || 'No Name',
        price: item.querySelector('.product-price')?.innerText || 'No Price',
        link: item.querySelector('a.product-card__link-overlay')?.href || 'No Link'
      }));
    });

    console.log('Extracted Products:', products);

  } catch (error) {
    console.error('Error occurred during scraping:', error);
  } finally {
    await browser.close();
  }
})();
Debugging Techniques in Puppeteer
Puppeteer offers several debugging tools to help you diagnose issues like missing elements, JavaScript errors, or unexpected behavior.
-
Browser Logs: Capture browser logs using
page.on('console')to debug issues happening in the browser.page.on('console', msg => { console.log(`Browser log: ${msg.text()}`); }); await page.goto('https://www.nike.com/w/new-arrivals'); -
Verbose Logging: Enable detailed logging for Puppeteer’s actions by setting the
DEBUGenvironment variable. This helps track navigation events, network requests, and errors.DEBUG="puppeteer:*" node your-script.jsThis prints detailed logs of Puppeteer’s internal actions, which is useful for diagnosing navigation and selection issues.
Handling Specific Errors
It’s important to handle specific errors when scraping. For example, if an element you expect to scrape doesn’t appear on the page, you can catch and log the error without crashing the script.
try {
  const element = await page.$('.non-existent-class');
  if (!element) {
    console.error('Element not found.');
  } else {
    const text = await element.evaluate(el => el.innerText);
    console.log('Element Text:', text);
  }
} catch (error) {
  console.error('Error fetching element:', error.message);
}
Capturing Network Errors
Network failures, such as an API returning an error, can also be captured using Puppeteer’s page.on('response') event.
page.on('response', response => {
  if (!response.ok()) {
    console.error(`Network error: ${response.url()}`);
  }
});
This logs network errors that occur during API calls or page loads, helping you troubleshoot connection issues.
Optimizing Performance for Large-Scale Scraping
When scraping a large number of pages, optimizing memory usage and managing multiple browser contexts efficiently becomes critical. Let’s see some techniques for reducing memory overhead and scaling scraping operations in Puppeteer.
Reducing Memory Footprint
Puppeteer can consume a lot of memory, especially when scraping multiple pages at once. Here are some key strategies to optimize memory usage:
- Limit Concurrent Pages: Opening too many pages at once can quickly increase memory consumption. Make sure to open only the necessary number of pages and close them immediately after completing their tasks.
- Reuse a Single Browser Instance: Instead of launching a new browser for each task, reuse a single instance to reduce memory overhead.
- Close Unnecessary Tabs: Closing tabs as soon as they finish scraping is crucial for managing memory efficiently. This reduces the overall memory footprint of the script.
Here’s an example of how to optimize memory usage when scraping multiple pages with Puppeteer:
import puppeteer from 'puppeteer-extra';

(async () => {
  const browser = await puppeteer.launch({ headless: true });

  try {
    // Task 1: Scrape product title from Nike new arrivals page
    const page1 = await browser.newPage();
    await page1.goto('https://www.nike.com/w/new-arrivals', { waitUntil: 'domcontentloaded' });
    const productTitle1 = await page1.$eval('.product-card__title', el => el.innerText);
    console.log('Product 1 Title:', productTitle1);
    await page1.close(); // Close the page to free memory

    // Task 2: Scrape product title from Nike best sellers page
    const page2 = await browser.newPage();
    await page2.goto('https://www.nike.com/w/best-76m50', { waitUntil: 'domcontentloaded' });
    const productTitle2 = await page2.$eval('.product-card__title', el => el.innerText);
    console.log('Product 2 Title:', productTitle2);
    await page2.close(); // Close the page to free memory

  } catch (error) {
    console.error('Error during scraping:', error);
  } finally {
    await browser.close();
  }
})();
In this code, we reuse a single browser instance to scrape multiple pages and each page is closed immediately after the data is scraped to free up memory and avoid leaving unnecessary tabs open.
Handling Large-Scale Scraping with Puppeteer Cluster
When dealing with large-scale scraping, Puppeteer Cluster is an ideal solution. It allows you to manage multiple browser instances and distribute scraping tasks in parallel, improving both speed and resource efficiency.
To get started with Puppeteer Cluster, install it using npm:
npm install puppeteer-cluster
Here’s an example of how to use Puppeteer Cluster to scrape multiple pages concurrently:
import { Cluster } from 'puppeteer-cluster';

(async () => {
  // Create a cluster with a limited number of workers (browsers)
  const cluster = await Cluster.launch({
    concurrency: Cluster.CONCURRENCY_BROWSER,
    maxConcurrency: 3,  // Limit to 3 concurrent browsers
    puppeteerOptions: { headless: true }
  });

  // Define a task to scrape product titles from Nike pages
  await cluster.task(async ({ page, data: url }) => {
    await page.goto(url, { waitUntil: 'networkidle0' });

    const productTitle = await page.evaluate(() => {
      const element = document.querySelector('.product-card__title');
      return element ? element.innerText : 'No title found';
    });

    console.log(`Scraped from ${url}: ${productTitle}`);
  });

  // Queue multiple Nike URLs for scraping
  cluster.queue('https://www.nike.com/w/new-arrivals');
  cluster.queue('https://www.nike.com/w/mens-new-shoes-3n82yznik1zy7ok');
  cluster.queue('https://www.nike.com/w/womens-new-shoes-5e1x6zy7ok');
  cluster.queue('https://www.nike.com/w/kids-new-shoes-3upxznik1zy7ok');
  cluster.queue('https://www.nike.com/w/new-backpacks-bags-3rauvznik1');

  // Wait for the cluster to finish all tasks
  await cluster.idle();
  await cluster.close();
})();
In this code:
- We create a cluster with a maximum of 3 concurrent headless browsers using
maxConcurrency: 3. This ensures that only 3 pages are scraped at the same time. - The
cluster.task()method defines the logic for scraping the product title from each Nike page. - URLs are queued using
cluster.queue(), and each page is scraped concurrently.
The result might look like:
Scraped from https://www.nike.com/w/new-3n82y: Nike C1TY “Surplus”
Scraped from https://www.nike.com/w/blazer-shoes-9gw3azy7ok: Nike Blazer Mid '77 Vintage
Scraped from https://www.nike.com/w/best-76m50: Nike Air Force 1 '07
Scraped from https://www.nike.com/w/zoom-vomero-shoes-7gee1zy7ok: Nike Zoom Vomero 5
Scraped from https://www.nike.com/w/air-max-shoes-a6d8hzy7ok: Nike Air Max Dn
Conclusion
This guide covered important Puppeteer modules and techniques for efficiently scraping dynamic websites. We examined how to handle JavaScript-heavy content, handle sessions and cookies for persistent authentication, bypass CAPTCHAs using third-party services, and avoid bot detection by using rotating proxies, user agents, and human-like interactions.
While Puppeteer is a powerful tool, scraping still presents challenges like advanced anti-bot systems, CAPTCHA roadblocks, and rate limiting. You can overcome these challenges with Scrape.do, the best tool to scrape any website without getting blocked. Get started today with 1000 free credits.
Happy scraping!
Also You May Interest


